1. Eclipse Mirror加速
Eclipse 国内源有以下几个:
- 中国科学技术大学 http://mirrors.ustc.edu.cn/eclipse/
- 北京理工大学 http://mirror.bit.edu.cn/eclipse/
- 大连东软信息学院 http://mirrors.neusoft.edu.cn/eclipse/
导出Availble Software Sites,作为备份1
2
3
4
5
6
7
8
<bookmarks>
<site url="http://download.eclipse.org/releases/2018-09" selected="true" name="2018-09"/>
<site url="http://download.eclipse.org/eclipse/updates/4.9/R-4.9-201809060745" selected="true" name="Eclipse Project Repository for 2018-09"/>
<site url="http://download.eclipse.org/releases/latest" selected="false" name="Latest Eclipse Release"/>
<site url="http://download.eclipse.org/eclipse/updates/4.9" selected="true" name="The Eclipse Project Updates"/>
<site url="http://download.eclipse.org/webtools/repository/photon" selected="true" name="The Eclipse Web Tools Platform (WTP) software repository"/>
</bookmarks>
将URL中的 http://download.eclipse.org 替换为 http://mirror.bit.edu.cn/eclipse
1 |
|
将Availble Software Sites中的每一项全部删除,导入新的xml配置即可
2. Eclipse 下载
直接在国内源下载Eclipse,速度比官网要快。下载之前可以先进入各个国内源网站,找一个速度最快的。
进入 http://mirror.bit.edu.cn/eclipse/technology/epp/downloads/release/ ,找到自己想要的版本
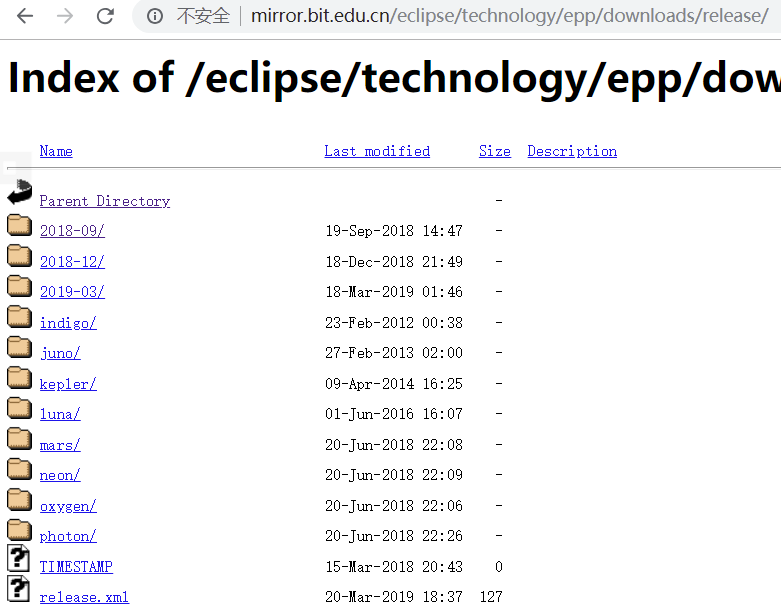
以eclipse-jee-2018-09为例
- Win64版本:eclipse-jee-2018-09-RC1-win32-x86_64.zip
- Linux64版本:eclipse-jee-2018-09-RC1-linux-gtk-x86_64.tar.gz
下载完直接解压,双击eclipse.exe即可运行
3. Eclipse Maven配置
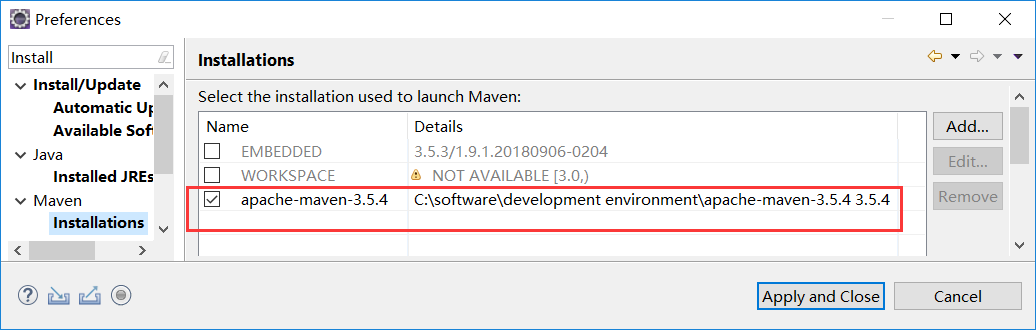
3.1. 改用外置Maven
Eclipse默认使用内置Maven。现在改用外置的Maven,Preferences->Maven->Installations->点击Add添加,浏览外置Maven的安装路径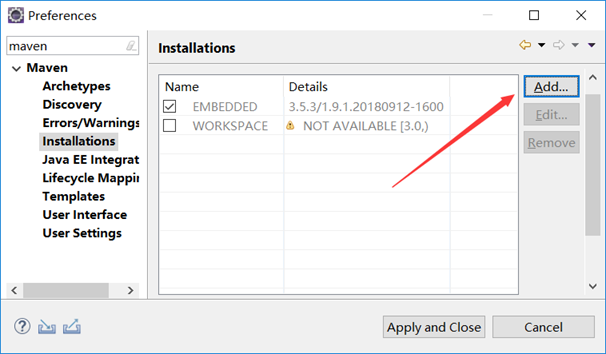
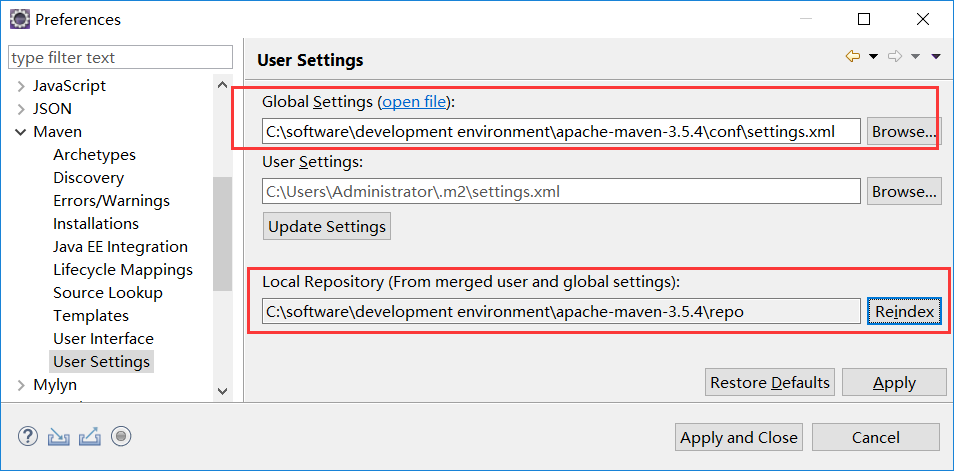
3.2. 设置settings.xml
Preferences->Maven->User Settings
- 设置Global Settings指定外置Maven的settings.xml
- 设置本地仓库路径
4. Eclipse 插件安装汇总
4.1. 安装STS插件
进入 https://spring.io/tools3/sts/all/ ,找到Update Site Archives
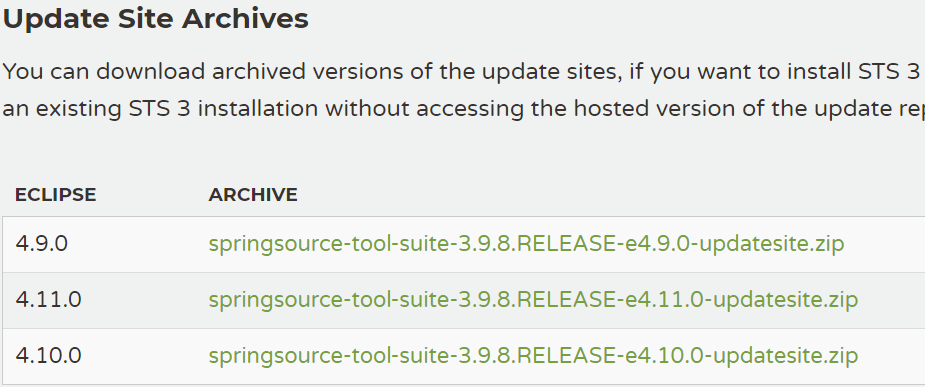
那么应该下载哪个包呢?以其中一个包名为例: springsource-tool-suite-3.9.8.RELEASE-e4.9.0-updatesite.zip
- 前面的3.9.8代表STS插件的版本
- 后面的e4.9.0代表Eclipse的版本
只要对准Eclipse的版本,下载对应的STS插件包即可。打开Eclipse,菜单栏Help->About Eclipse IDE,查看Version,就可以看到对应的版本号。我的Eclipse是4.9.0,就要下载springsource-tool-suite-3.9.8.RELEASE-e4.9.0-updatesite.zip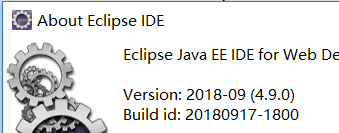
下面就是Eclipse离线安装插件的常规操作了。Help->Install New Software->点击Add->点击Archive,浏览插件zip,Name不必设置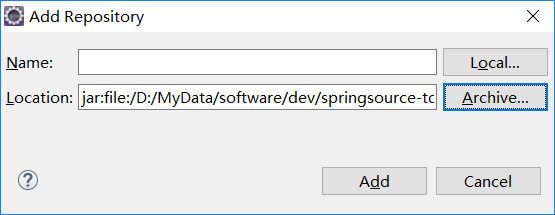
然后会列出很多项,只要勾选名称带有 “Spring IDE” 的即可
- Core / Spring IDE
- Extensions / Spring IDE
- Integrations / Spring IDE
- Resources / Spring IDE
切记去掉勾选”Contact all update-sites ….” ,否则会联网更新相关东西,没有必要,甚至可能导致安装失败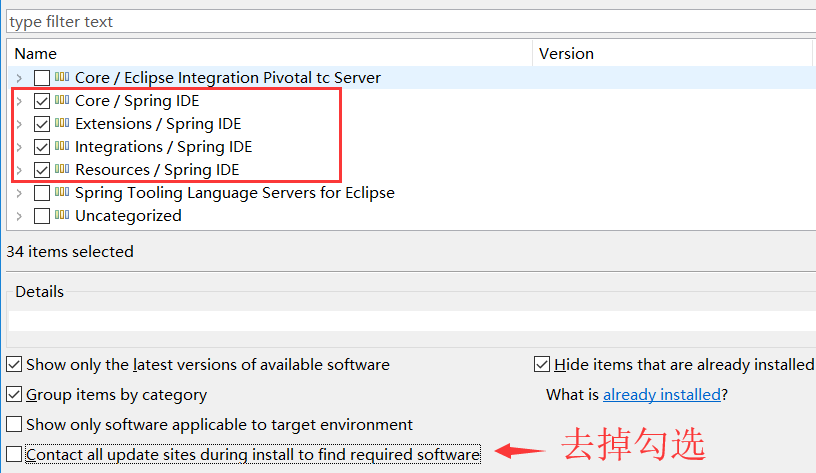
验证是否安装成功:
- Help->About Eclipse IDE->查看是否有Spring IDE Developers
- Preferences->查看是否有Spring选项
- New Project->查看是否有Spring及SpringBoot选项
4.2. 安装Lombok插件
到Lombok官网下载 lombok.jar,直接下载最新版本就可以
https://projectlombok.org/download
将lombok.jar移动到Eclipse的安装路径,也就是与eclipse.exe / eclipse.ini放在同一路径下
编辑eclipse.ini,加入以下配置1
2-Xbootclasspath/a:lombok.jar
-javaagent:lombok.jar
重启Eclipse,添加Lombok依赖,就可以使用Lombok注解了
4.3. 安装Alibaba P3C插件
参考文档:P3C Github的wiki页面
https://github.com/alibaba/p3c/wiki/Eclipse%E6%8F%92%E4%BB%B6%E4%BD%BF%E7%94%A8%E6%96%87%E6%A1%A3
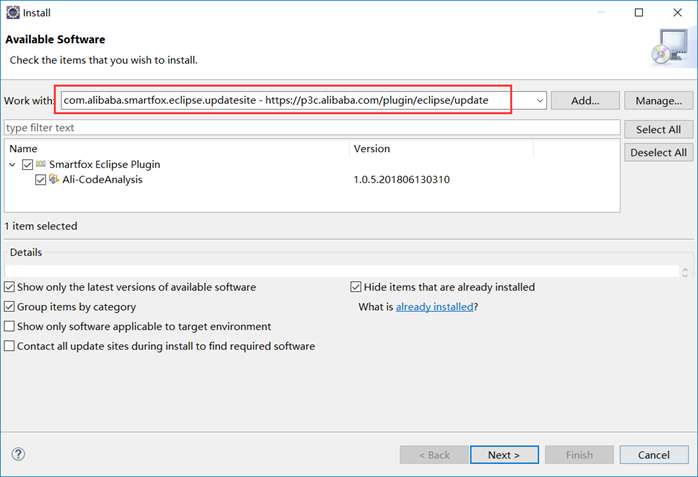
Help->Install New Software打开插件安装界面
在Work with处直接输入Update Site地址https://p3c.alibaba.com/plugin/eclipse/update ,按回车,然后勾选Ali-CodeAnalysis,再一直点Next Next…按提示走下去就好。 然后就是提示重启了,安装完毕。注意”contact all update sites during install to find required software”去掉勾选,不然会很慢。
5. Eclipse Web开发
5.1. Eclipse Tomcat Web环境配置
5.1.1. 配置Tomcat服务器运行环境(Server Runtime Environments)
Preferences->Server->Runtime Environments->Add->浏览Apache Tomcat目录,添加即可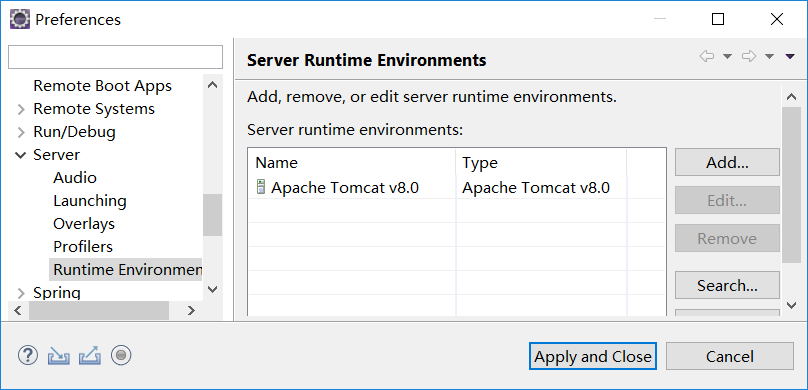
5.1.2. 配置Tomcat服务器运行参数
Window->Show View->打开Servers视图->添加Tomcat服务
添加完后,双击Tomcat v8.0 Server at localhost [Stopped],出现配置界面。关键是Server Locations,选中Use Tomcat installation,Deploy Path设置为webapps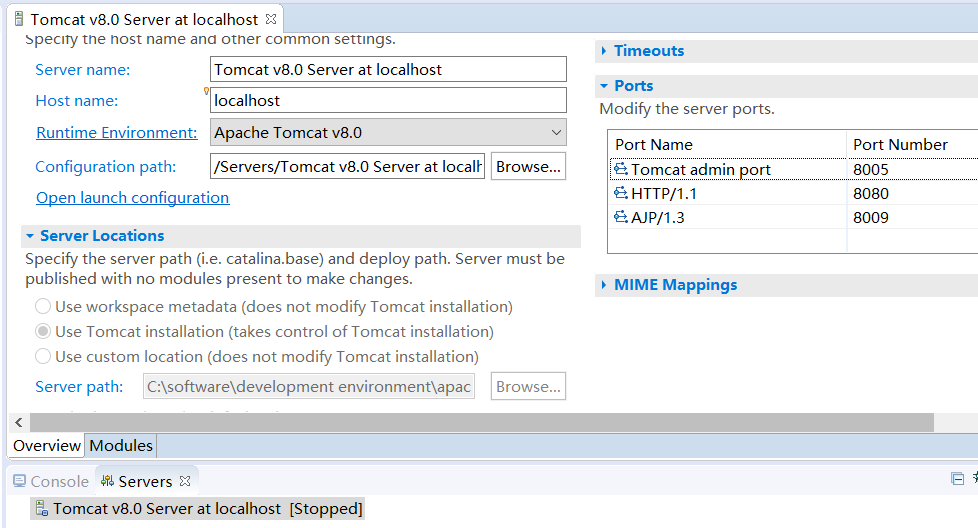
5.1.3. 为工程添加Tomcat Web运行依赖
工程右键->Build Path->Add Library
- 添加Web App Libraries
- 添加Server Runtime->Tomcat
5.2. 创建Maven Web工程
创建一个Maven工程,打包方式设置为war,就是一个Web工程
创建项目之后,pom.xml报错,是因为项目没有web.xml。一种方式是手动在/src/main/webapp目录下创建WEB-INF目录,并添加web.xml如下:1
2
3
4
5
6
7
8
9
10
<web-app xmlns:xsi="http://www.w3.org/2001/XMLSchema-instance"
xmlns="http://java.sun.com/xml/ns/javaee"
xsi:schemaLocation="http://java.sun.com/xml/ns/javaee http://java.sun.com/xml/ns/javaee/web-app_2_5.xsd"
version="2.5">
<display-name>springmvc-learning</display-name>
<welcome-file-list>
<welcome-file>index.html</welcome-file>
</welcome-file-list>
</web-app>
Eclipse-JEE版本提供了快速创建web.xml的方式。工程右键->Java EE Tools->Generate Deployment Descriptor Stub
5.2.1. 添加tomcat插件
添加完插件,右键项目->Maven->Update Project->选项当前项目->OK1
2
3
4
5
6
7
8
9
10
11
12
13<build>
<plugins>
<plugin>
<groupId>org.apache.tomcat.maven</groupId>
<artifactId>tomcat7-maven-plugin</artifactId>
<version>2.2</version>
<configuration>
<port>8080</port>
<path>/</path>
</configuration>
</plugin>
</plugins>
</build>
右键项目->Run As->Maven build…….->在Goals中输入1
clean tomcat7:run
5.2.2. tomcat插件热部署
所谓热部署就是在tomcat服务器不停机的情况下,将新的war包放上去,达到服务不中断,用户无察觉的目的
修改Tomcat安装目录下的的conf/tomcat-users.xml1
2
3
4<!-- 添加以下内容 -->
<role rolename="manager-gui" />
<role rolename="manager-script" />
<user username="root" password="123456" roles="manager-gui, manager-script"/>
运行startup.bat,先启动tomcat服务器
修改pom.xml中的tomcat插件配置1
2
3
4
5
6
7
8
9
10
11
12
13<plugin>
<groupId>org.apache.tomcat.maven</groupId>
<artifactId>tomcat7-maven-plugin</artifactId>
<version>2.2</version>
<configuration>
<port>8080</port>
<path>/</path>
<!-- tomcat的地址和端口,manager/text是固定的 -->
<url>http://localhost:8080/manager/text</url>
<username>root</username>
<password>123456</password>
</configuration>
</plugin>
运行以下maven命令1
clean tomcat7:redeploy -Dmaven.test.skip=true
5.3. 配置JSP默认编码
Preferences->Web->JSP Files->设置Encoding为UTF-8(默认IOS-8859-1)